Retaining wall installation means building a stable structure to hold soil where the ground changes grade. The work includes preparing a base and managing drainage behind the wall. A successful installation also accounts for soil conditions and loads above the wall, since water pressure and weak foundation support can affect stability.
Before work begins, confirm the design, drainage route, materials, and local permit requirements. For example, the City of Philadelphia requires a permit for retaining walls at least 2 feet high, while the City of Portland requires one for walls over 4 feet or those that support a surcharge load. Permit thresholds vary by jurisdiction, so check the requirements for your project. A 2026 U.S. estimate puts typical installation projects at $3,192–$9,200, with size, materials, and site complexity shaping the final budget. Planning these details early helps you create a wall suited to the slope and your outdoor space.
Key Takeaways
- Before excavation, confirm your soil and slope conditions, surcharge loads, buried utilities, engineering needs, drainage route, and local permit rules; permit thresholds vary by jurisdiction, so check the requirements for your project.
- A stable retaining wall needs a firm, compacted foundation suited to its design, a level first course for segmental-block walls, and drainage that relieves water pressure behind the wall.
- During construction, follow the wall system’s specified course setback and backfill plan, check alignment as the wall rises, and direct drainage outlets away from buildings, neighboring properties, and areas prone to erosion or pooling.
- For early budgeting, typical U.S. retaining-wall installation costs range from $3,192–$9,200, with an average of $6,083; your final cost depends on wall size, material, site complexity, access, and engineering needs.
How Does Retaining Wall Installation Work?
Retaining wall installation involves planning for soil and loads, preparing a stable base, building and leveling the wall, and managing water behind it. A retaining wall holds soil where the ground changes elevation and prevents it from sliding down a hill or another sudden change in elevation.
A successful installation depends on site conditions, drainage, foundation support, and loads above the wall. Slope, soil, and nearby structures all help shape the design. Material choice also affects construction: segmental concrete-block walls are assembled in courses, while poured-concrete walls are formed as a continuous structure.
The process starts with assessing the site and confirming applicable requirements, then laying out the wall and excavating for its foundation. Crews prepare a stable base before installing and leveling each course. They coordinate drainage and backfill as the wall rises, then add caps and complete the surrounding landscape work. This sequence provides a framework, but the design and construction details need to suit the specific site.
What Should You Check Before Installation?
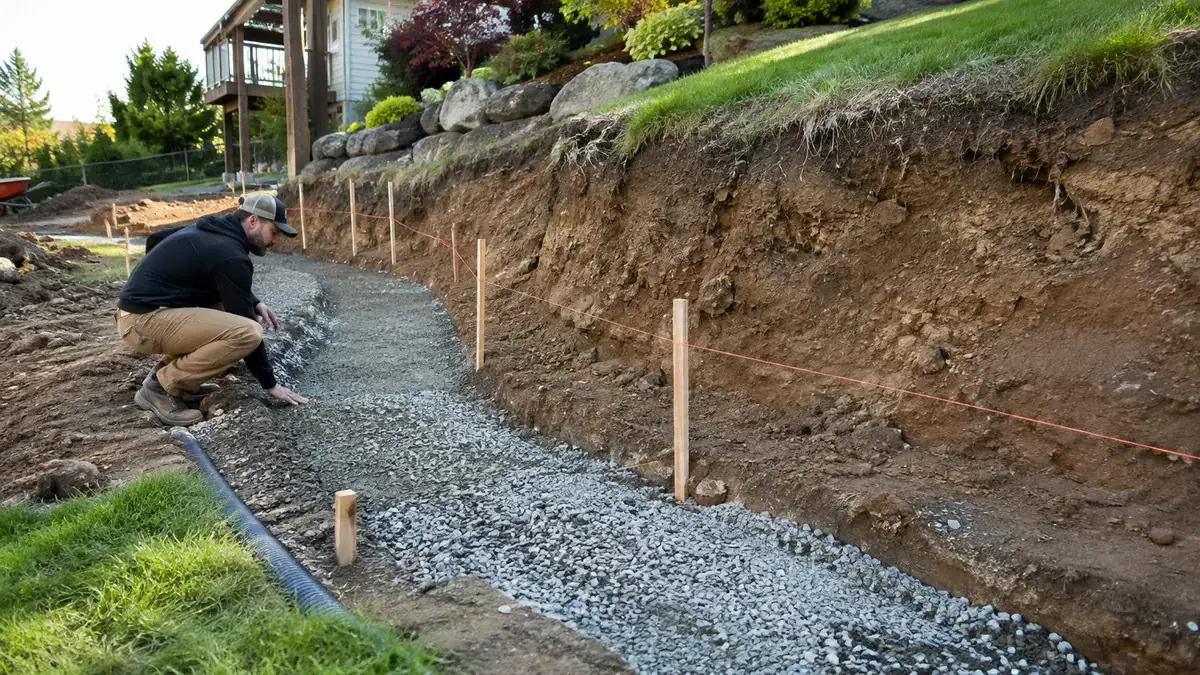
Before digging, verify soil and slope conditions, loads above the wall, buried utilities, permit rules, engineering needs, and how the wall fits into your overall landscape plan. Check whether nearby structures could be affected by excavation or soil movement, and identify surcharge loads, meaning added weight near or above the wall, such as vehicles or buildings. Have underground utilities marked before excavation.
Local permit thresholds differ, so check the requirements for the jurisdiction where your project is located.
For permitted Portland walls over 4 feet tall, drawings and calculations must be stamped by an Oregon-registered engineer. Roanoke County requires a permit for walls retaining 3 feet or more of unbalanced fill, and stamped plans for walls 6–10 feet high. The county lists a 7-working-day plan review for walls over 4 feet. Check the rules, review timelines, and engineering requirements in the jurisdiction where your project is located.
The 2024 International Building Code addresses stability against overturning, sliding, excessive foundation pressure, and water uplift, with a minimum safety factor of 1.5 against sliding and overturning. It also requires a guard in certain conditions: when a retaining wall is within 36 inches of a walking surface more than 30 inches above the grade below, measured within 36 inches horizontally of the wall’s open side. Local adoption and amendments affect which code requirements apply.
For mortarless walls made with machine-made dry-cast segmental retaining-wall units, ASTM C1372-24 is a relevant specification. Include tiered walls in the overall site plan, since the placement of each level can affect the space, access, and loads around the other walls.
How Do You Prepare the Site and Base?
Prepare the site by marking the wall alignment, excavating to the design dimensions, and building a firm, compacted foundation suited to the wall system and ground conditions. The base for segmental concrete blocks differs from the footing for a poured-concrete wall, so follow the approved design rather than applying the same depth or detail to every project. Use this sequence to prepare the footprint before setting the first course:
- Mark the wall line and ends, then check how the alignment meets the slope, available access, planned drainage route, and nearby landscape features such as patios, planting areas, or trees.
- Confirm that the marked position matches the design and leaves room to build the wall and its base. Adjust the layout before excavation if the route conflicts with access or landscape plans.
- Excavate to the planned dimensions, removing loose material and shaping the foundation area to suit the wall design and site conditions. Required depth and excavation details vary with the design, soil, and ground conditions.
- Prepare a firm, even foundation. For a segmental-block design, install the specified base material; for poured concrete, prepare the footing form and foundation area according to the design.
- Compact the base and check that it is level and consistent along the wall line before placing the first course. Correct soft spots or uneven areas rather than setting blocks or forms on loose ground.
A poorly prepared foundation can settle unevenly, causing the wall to move or lose alignment. The first course needs consistent support along its length, so do not use loose soil to make up low areas.
How Are Retaining Wall Courses Installed?
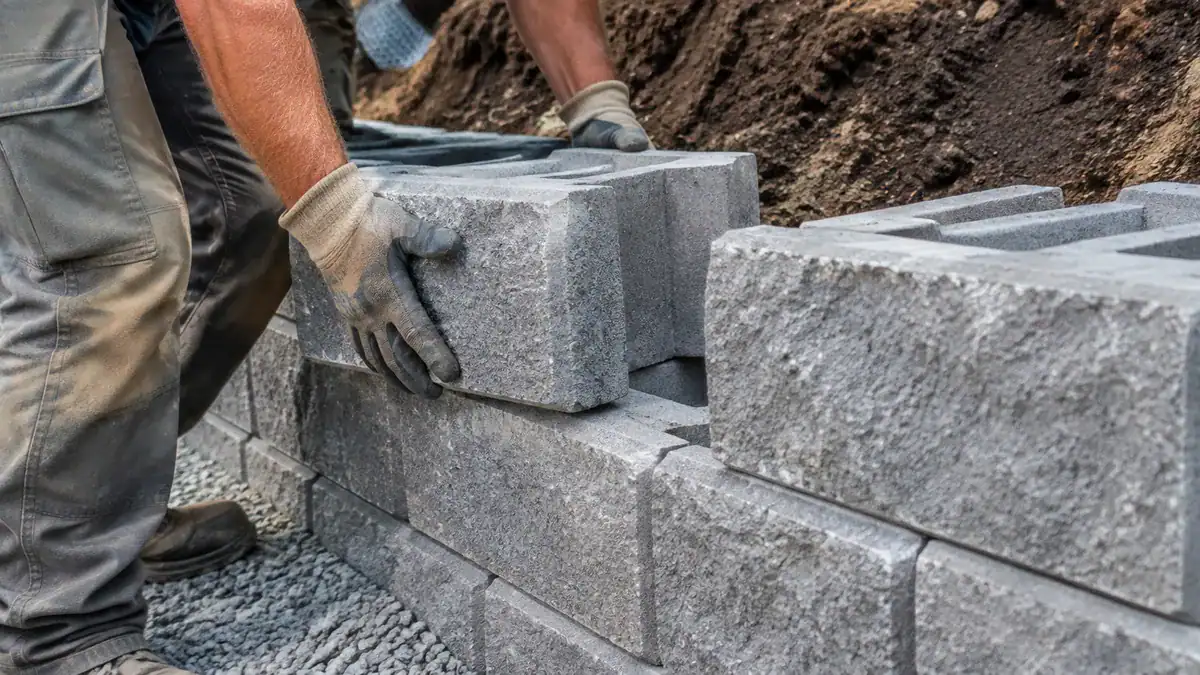
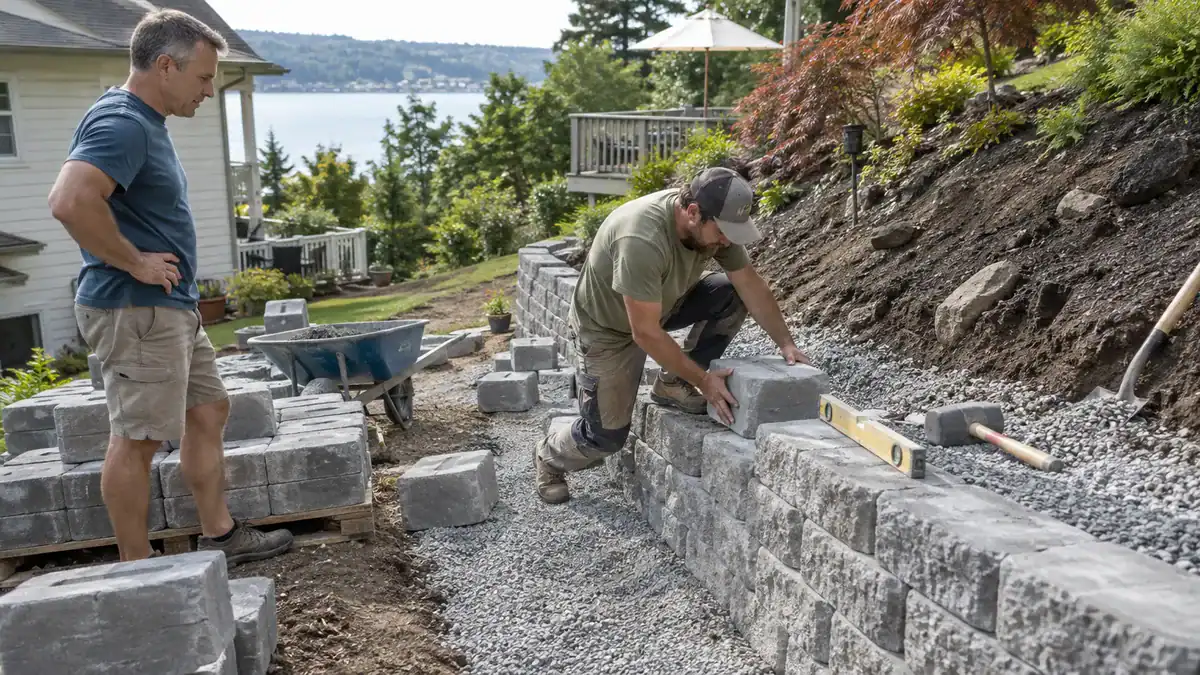
Install retaining wall courses by carefully leveling the first course, stacking each following course to the wall system’s specified setback and joint pattern, checking alignment as the wall rises, and finishing the top with caps or coordinated hardscape.
For a segmental concrete-block wall, the first course establishes the line and level for every course above it. Set each unit fully on the prepared base, then check the row from end to end and across its depth with a level. Adjust units before building higher, since small differences in the first row can become more noticeable as the wall rises. Use a stringline or straightedge to keep the face aligned with the design.
Build successive courses according to the manufacturer’s system and approved design. A setback is the amount each course steps back toward the retained soil. Follow the specified setback rather than choosing one by eye. Stagger vertical joints as designed so joints in one course do not simply continue through the course below. Check the wall’s level and alignment after each course or at regular stages, correcting movement before adding more units.
Poured-concrete walls are formed and poured as a continuous structure, so they are not assembled in courses like segmental blocks. The course-by-course checks apply to block systems; poured walls instead follow the formwork and reinforcement details in their design.
Finish the top with compatible caps or another specified coping treatment, securing the pieces as the wall system directs. Choose a finish that suits the wall material and connects visually with nearby paving, steps, planting beds, or other landscape features. Coordinated textures and colors help the wall feel integrated with the rest of your outdoor space.
How Does Drainage Protect a Retaining Wall?
Drainage protects a retaining wall by giving water behind it a planned route out, reducing hydrostatic pressure that can push the wall forward or add stress to its foundation. Soil can hold water after rain or irrigation, so the wall design needs to account for how water moves through the retained ground.
Plan drainage for the actual slope, soil, wall type, and surrounding landscape. Surface grading helps direct runoff, but it may not relieve water trapped behind the wall. Depending on the design, drainage details may include permeable backfill, a drain pipe, or other specified outlets. Segmental-block and poured-concrete walls have different construction details, so use the drainage system designed for the selected wall rather than assuming one detail suits both.
Backfill placement and compaction also affect performance. Place suitable backfill in controlled layers as construction progresses, and compact it using methods appropriate to the wall design. Careless placement can leave uneven support, while overly aggressive loading during construction can put unnecessary pressure on a wall that is still being built. Follow the design’s sequence and keep heavy equipment from imposing unintended loads near the wall.
Coordinate the outlet location with your property’s grading and drainage plan. Direct discharged water to an appropriate area rather than toward a building, neighboring property, walkway, or another spot where it could cause erosion or pooling. Make sure the route remains usable after planting, paving, and other landscape work is complete.
Drainage is a core structural consideration, not a finishing detail. A wall with suitable backfill, controlled compaction, and a coordinated water route is better positioned to maintain its stability over time.
Common Drainage Components in Retaining Wall Installation
Most residential retaining wall installation projects use some combination of these drainage details, depending on the wall type and engineer’s design:
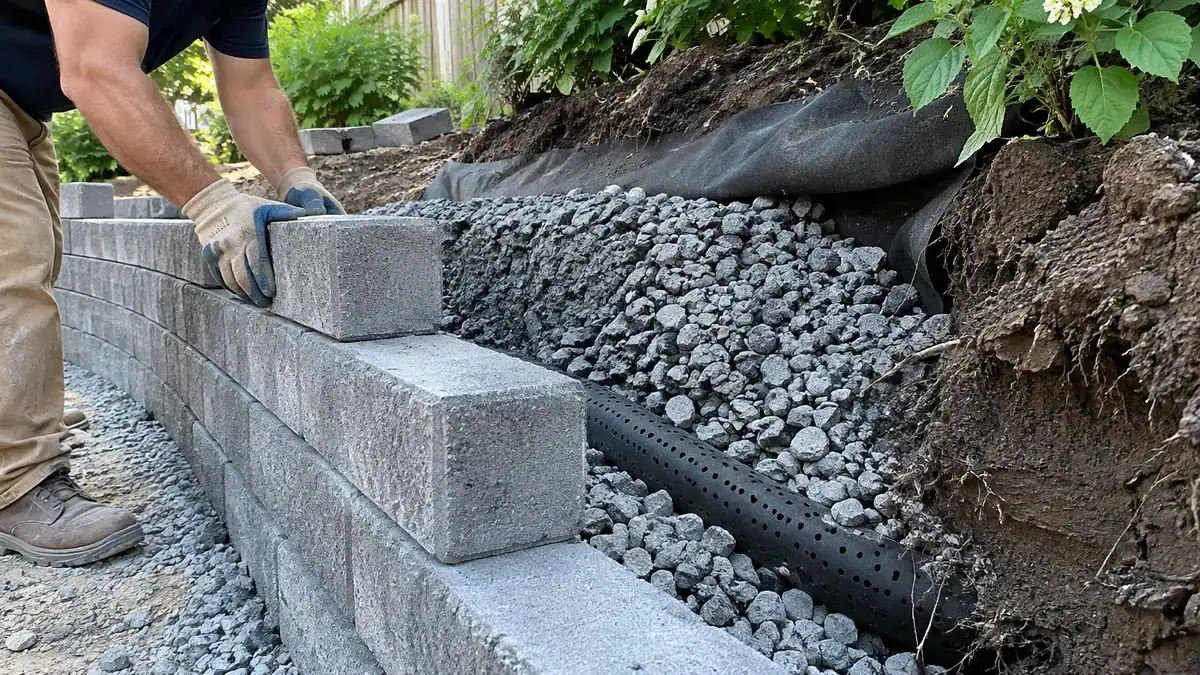
- Gravel backfill: a zone of clean, crushed drainage stone directly behind the wall lets water move down instead of building up against the blocks.
- Perforated drain pipe: a perforated pipe set at the base of the gravel zone collects water and carries it to a planned outlet.
- Filter fabric: geotextile fabric between the native soil and the gravel keeps fine soil from clogging the drainage stone over time.
- Weep holes: on poured concrete and mortared walls, small openings near the base let trapped water escape through the face of the wall.
Taller segmental walls may also need geogrid layers tied into the backfill. In Los Angeles, walls over 4 feet tall, measured from the bottom of the footing, or walls that hold back a slope or driveway load generally need an engineered design and a building permit, so confirm the requirements with the city before work begins.
What Does Retaining Wall Installation Cost?
A 2026 U.S. estimate reports an average installed retaining-wall cost of $6,083, with most projects ranging from $3,192 to $9,200, based on 2,556 verified projects. These national figures are useful for early budgeting, not as a guaranteed Los Angeles quote.
2026 all-in estimates list $10–$15 per square foot for vinyl, $15–$30 for timber, and $30–$50 for concrete. For a concrete wall, clarify whether the estimate covers segmental concrete blocks or poured concrete, since they are different construction systems.
Wall size affects the amount of material, excavation, and drainage work required. Site complexity, including slope and ground conditions, can also change the scope. Limited access may complicate moving materials or removing excavated soil, while engineering needs can add design work. Ask for each item to be described in the estimate rather than relying on a single total.
Before requesting a quote, gather the planned wall length and height, preferred material, site access details, and any known drainage or engineering requirements. Ask whether the proposed budget includes excavation, drainage components, and related design work, and clarify how changes to the scope would affect the estimate.
Plan the wall alongside related landscape or backyard improvements, such as steps, paving, or planting areas. Coordinating the work can help align the construction sequence, define a shared scope, and guide budget decisions across your full outdoor project.
Common Installation Mistakes to Avoid
Avoid preventable problems by checking each construction detail as work progresses:
- Digging before underground utilities are marked
- Underestimating soil conditions or added loads from vehicles and buildings
- Skipping permits required by the local jurisdiction
- Building on a poorly prepared base or leaving the first course out of level
- Ignoring the designed setback or compacting backfill carelessly
- Overlooking drainage behind the wall or its outlet route
Project duration depends on wall type, site conditions, access, and the work included. For specified bridge-scale walls approximately 50 feet long and 15 feet tall, the Federal Highway Administration lists minimum installation times of 3 days for precast cantilever walls and 4 days for mechanically stabilized earth and modular-block systems, including specified placement and backfilling work. Those schedules are not a forecast for a residential project.
All County Landscape-Hardscape works with Los Angeles homeowners on custom landscape design, hardscaping, and backyard remodeling. A coordinated start-to-finish plan connects your wall design with the wider outdoor project. Our commitment to on-time completion, budget-conscious delivery, and environmentally responsible construction helps guide scheduling and scope decisions.
Plan Your Retaining Wall With Confidence
If your retaining wall is part of a Los Angeles backyard remodel, start with a short project brief. Sketch the proposed wall line and note how you want the space to work on both sides: perhaps a level patio above, a planting bed below, or steps connecting separate areas. Add current site photos and identify any features the design needs to work around.
Use the brief to discuss whether segmental concrete block or poured concrete better fits the wall’s layout, finish, and role in the larger landscape. The final choice should follow the site-specific design, not appearance alone. If your project also includes paving, planting, or other outdoor living features, consider them together so the wall’s position and construction can be coordinated with the full plan.
All County Landscape-Hardscape provides custom landscape design, construction, and outdoor living installations for residential and commercial clients across Los Angeles. Our approach emphasizes thoughtful design, durable construction, on-time project completion, budget-conscious delivery, and environmentally responsible practices. Contact All County Landscape-Hardscape to discuss your retaining wall plans, or explore our Hardscape Services.
Frequently Asked Questions
1. How can you tell whether a retaining wall needs geogrid reinforcement?
A retaining wall needs geogrid when its site-specific design calls for soil reinforcement to provide stability. Wall height alone does not determine the need; soil conditions, slope, nearby loads, and the wall system also matter.
2. Can a retaining wall be built on a property line?
A retaining wall may be allowed on or near a property line, depending on local requirements and the site. Confirm the boundary and check applicable setback, permit, drainage, and construction-access requirements before finalizing the wall location.
3. Which plants are suitable near a retaining wall?
Plants with manageable roots and water needs suited to the site are generally a better choice near a retaining wall. Keep planting clear of drainage outlets, and avoid choices that could disrupt the wall or block its drainage route as they grow.
4. How long does residential retaining wall installation take?
Residential retaining wall installation has no fixed timeline because the duration depends on the wall design, site access, ground conditions, and work involved. Excavation, drainage, engineering, and related landscape work can also affect scheduling.
5. How do you install a stone retaining wall?
A stone retaining wall is installed on a prepared foundation, with stones placed in stable courses and drainage and backfill incorporated as specified by the design. Dry-stacked and mortared walls use different construction details, so the approach should suit the wall system, soil, slope, and nearby loads.